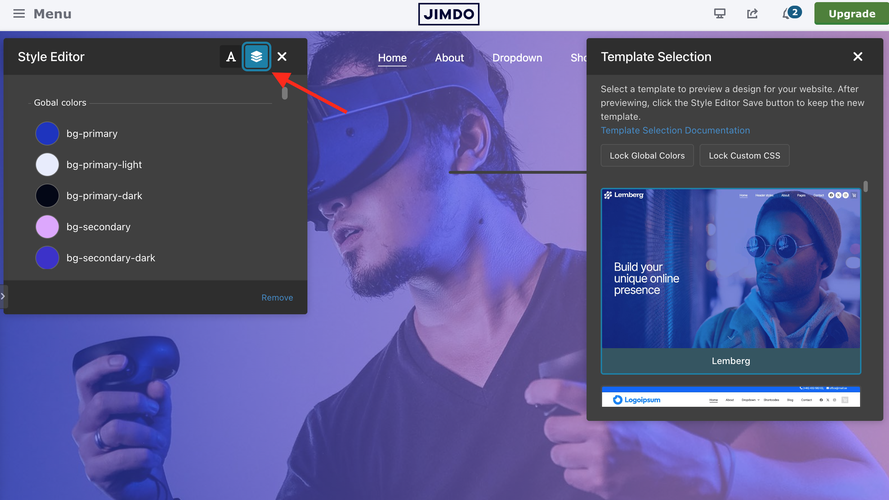
Template Selection
Your starting design is never final. No matter which look you set up first — a default theme, a custom palette, or a hand-tuned Style Editor — you can always open the Template Selection popup and switch to a new design in one click.
Change anytime — starting design doesn’t lock you in
Always reversible
Whether you began with a Matrix default, a premade pack, or a fully custom Style Editor setup — open Style Editor → Template Selection, click another preview, and your site’s design updates immediately. Then hit Save to keep it.
-
You’re never stuck with the first template or layout you chose
-
Switching is done from the same popup, any time you’re editing
-
Optional locks keep your brand colors and custom CSS while the rest of the design changes
-
Your page content (text, images, modules) stays — only the theme/config layer updates
Overview
Template Selection lives inside the Style Editor. A button in the editor header opens a draggable popup with visual previews. Click a card to apply that template’s colors, layout classes, and config — then save when you’re happy.
-
Visual preview cards — see the design before you commit
-
Active template highlighted (and moved to the top when you reopen)
-
Templates load from a CDN so the list stays up to date
-
Lock Global Colors / Lock Custom CSS when you want a new look without losing your brand
1 Quick setup
Template Selection is off by default. Turn it on once, then the button stays available in Style Editor.
Step 1 — Enable the feature
window.MatrixConfig = {
  features: {
    templateSelection: true // Show Template Selection in Style Editor
  }
};Step 2 — Open Style Editor
In the Jimdo admin, open the Matrix Style Editor. You’ll see the Template Selection icon in the header.
2 Switch a template
This is the whole workflow — use it on day one or months later.
Open Template Selection
In Style Editor, click the template button in the header.
(Optional) Turn on locks
Use Lock Global Colors and/or Lock Custom CSS if you want to keep your palette or CSS.
Click a preview
The new template applies instantly in the editor preview.
Save
Click Save in the Style Editor to keep the change on the live site.
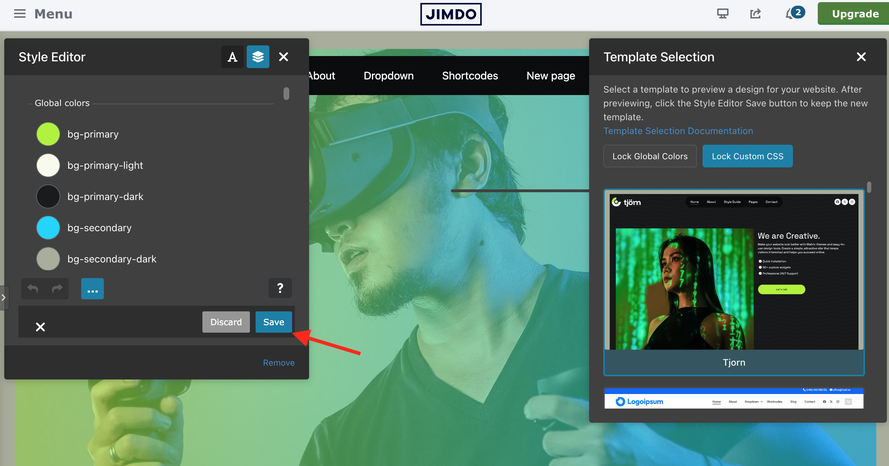
Lock colors & CSS
Switching templates normally brings the new design’s colors and custom CSS. Locks let you keep your brand while still changing layout and other config.
| Control | When locked | When unlocked |
|---|---|---|
| Lock Global Colors | Keeps your primary/secondary palette and button colors | New template’s colors replace yours |
| Lock Custom CSS | Keeps your Custom CSS field (and related head CSS) | New template’s CSS replaces yours |

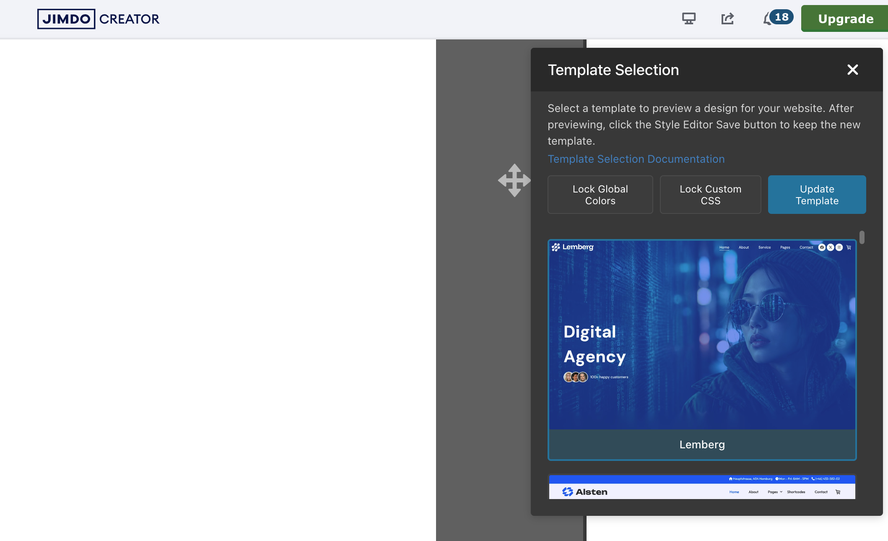
Update Template
Already on a Matrix template and the creator shipped improvements? Use the blue Update Template button to refresh the template structure while keeping your colors, config classes, and CSS.
-
Best when new Style Editor options were added to your current template
-
Not for switching looks — pick a different preview card for that
-
Only available when an official (listed) template is active
What you get
The popup loads templates from the Matrix CDN and groups them for browsing:
| Group | Examples |
|---|---|
| Default templates | Alsten, Lemberg, Zion, Bergen, Nordland, Enkel, and more |
| Pre-built / niche | Corporation, Creative Studio, Hotel, Photography, Beauty Spa, Fashion Store, and more |
Troubleshooting
| Issue | Fix |
|---|---|
| No template button in Style Editor |
Set templateSelection: true, confirm Style Editor is on, and upload the latest build.
|
| “Loading templates…” never finishes | Check network access to the templates CDN; reload and reopen the popup. |
| Colors/CSS change when I didn’t want them to | Enable Lock Global Colors / Lock Custom CSS before clicking a new template, then Save. |
| New look disappears after reload | You must click Save in the Style Editor after applying a template. |
| Can I go back to my old design? | Yes — reopen Template Selection and pick the previous template again (or any other). Locks still apply if enabled. |
If you have encountered any bugs, errors, or unexpected behavior in Template Selection module, please leave a comment below.