Global Settings
The Global Settings feature is a centralized configuration system within the Matrix Framework Style Editor that allows users to manage website-wide settings including layout, typography, buttons, and images. This feature consolidates multiple global configuration options into a single, easy-to-use popup interface.
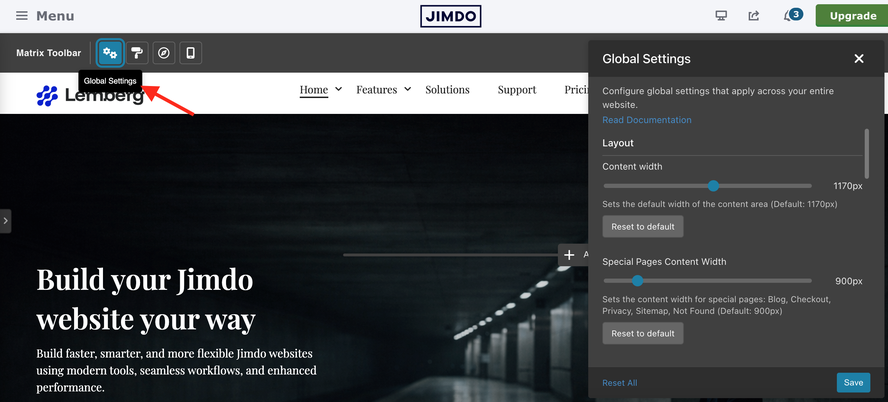
What is Global Settings?
Global Settings is a unified popup interface that provides centralized control over:
- Layout: Content width configuration
- Typography: Font selection (Primary, Secondary, Tertiary fonts)
- Buttons: Padding, border radius, and mobile fullwidth option for all buttons
- Images: Border radius for image modules
All settings are stored together in a single CSS style tag and persist across page reloads and template changes.
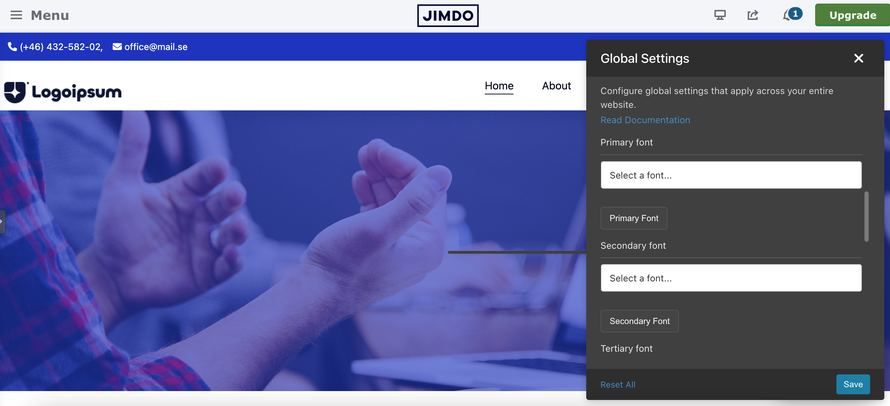
Font Selection
This guide provides a step-by-step tutorial on how to add one or more Google Fonts to your website.
In the Matrix toolbar, select Global Settings. In the popup that opens, scroll down to the Font Selection section.
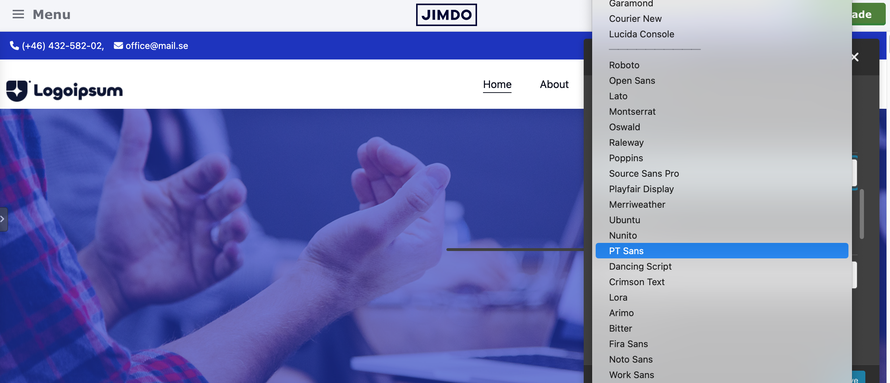
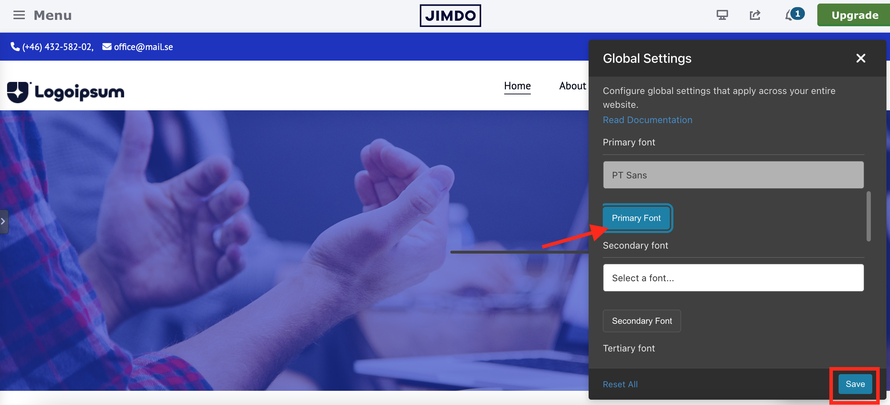
Select a font from the Primary Font dropdown. Then click the “Primary Font” button and, finally, click the Save button to confirm the changes.
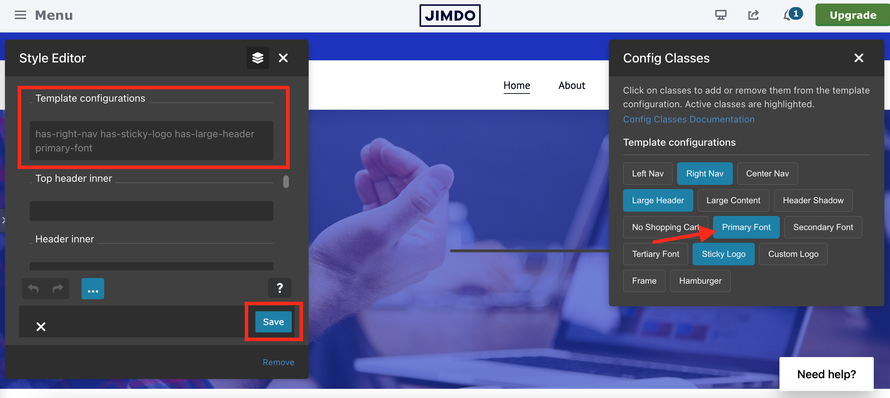
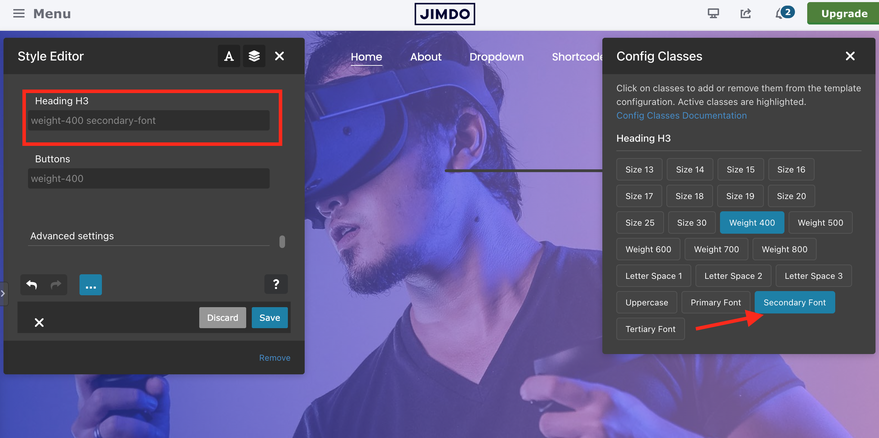
Open the Style Editor in the Matrix Toolbar and scroll down to Template Configuration. Click the input field and, in the popup that opens, select “Primary Font.” Then click the Save button in the Style Editor to confirm the changes.
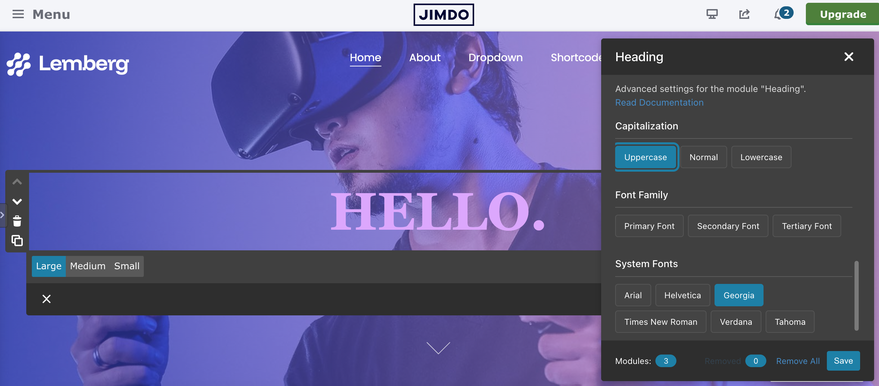
Adding the Primary Font to the Template Configuration allows you to apply the selected font globally to all elements of your website. Alternatively, you can apply it only to specific sections, such as navigation, headings, buttons, and other elements.
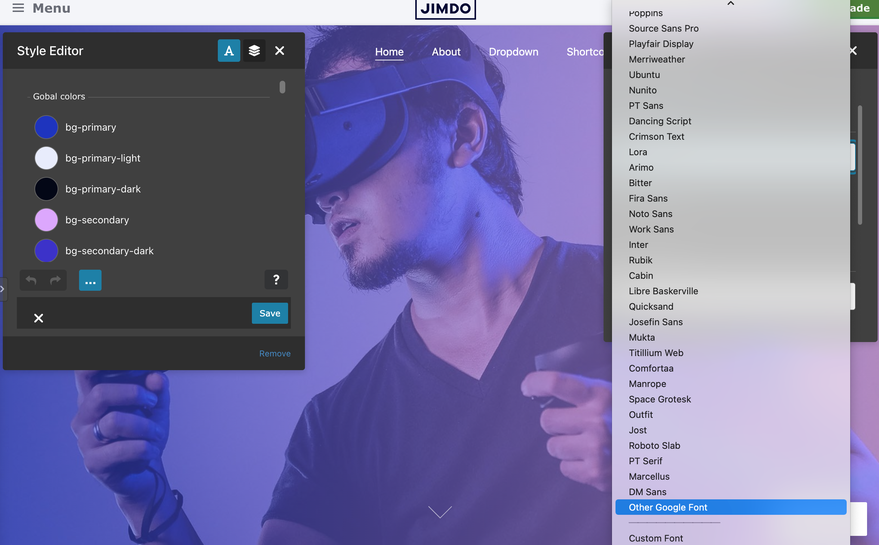
You can add up to three different Google Fonts to your website. If the font you want is not available in the preselected list, choose the last option “Other Google Fonts” and add it manually.
Available Fonts
- System Fonts (16 fonts)
- Google Fonts (30+ fonts + Custom Fonts)
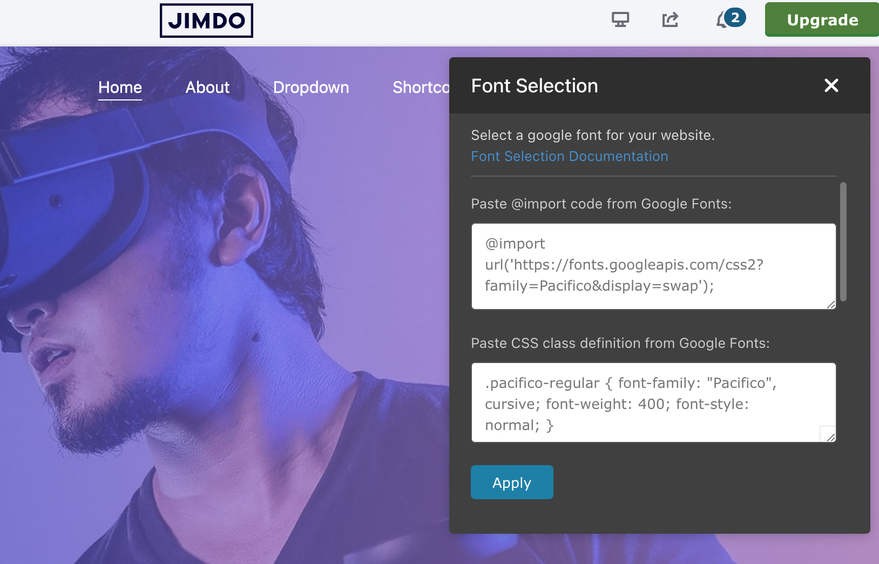
Other Google Fonts
You can add any Google Font not in the predefined list using the "Other Google Font" option:
1. Select "Other Google Font" from the dropdown in Font Selection popup (at the end of the Google fonts group)
2. Paste the `@import` code from Google Fonts website
3. Paste the CSS class definition from Google Fonts website
4. Click "Apply" and then click the font tag to activate

Custom Fonts (Self-hosted)
You can use any self-hosted font (fonts you've uploaded to your server) by defining them in `layout.css`:
1. Define your `@font-face` rules in `layout.css`
2. Define the `--custom-font` CSS variable in `layout.css`
3. Select "Custom Font" from the dropdown in Font Selection popup
4. Click "Apply" and then click the font tag to activate
Detailed Tutorial: Adding Custom Fonts to layout.css
Step 1: Prepare Your Font Files
- Make sure you have your font files (`.woff2`, `.woff`, `.ttf`, etc.) uploaded to your website
- Note the URL path to your font files
Step 2: Open layout.css
- Locate your `layout.css` file in Custom Template> CSS
Step 3: Add @font-face Rules
Add your `@font-face` declarations at the top of your CSS file (before other styles). Here's the structure:
/* Custom Font Definitions */
@font-face {
  font-family: "Brandon Grotesque";
  src: url("https://example.com/fonts/brandon-regular.woff2") format("woff2"),
       url("https://example.com/fonts/brandon-regular.woff") format("woff");
  font-weight: 400;
  font-style: normal;
  font-display: swap;
}

@font-face {
  font-family: "Brandon Grotesque";
  src: url("https://example.com/fonts/brandon-bold.woff2") format("woff2"),
       url("https://example.com/fonts/brandon-bold.woff") format("woff");
  font-weight: 700;
  font-style: normal;
  font-display: swap;
}

@font-face {
  font-family: "Brandon Grotesque";
  src: url("https://example.com/fonts/brandon-italic.woff2") format("woff2"),
       url("https://example.com/fonts/brandon-italic.woff") format("woff");
  font-weight: 400;
  font-style: italic;
  font-display: swap;
}

/* Define the CSS variable */
:root {
  --custom-font: "Brandon Grotesque", sans-serif;
}
If you have encountered any bugs, errors, or unexpected behavior in the Font Selection module, please leave a comment below.